One of the great things about WordPress is that you can add a text widget to any place on your blog that handles widgets. You can add just about any text or HTML you want, including bits of JavaScript and certain types of iframes. (One thing a text widget won’t handle is PHP. I don’t know why.)
Contents
Adding Text to a Text Widget
Let’s say that I want that I want to put a simple message on my blog thanking people for stopping by. The first thing to do is to head to the widget pane. Find the text widget, which looks like this:

Notice that is says “Arbitrary text or HTML”, which means any text or HTML you would like to add. You can actually add quite a bit here, and WordPress will render the HTML exactly as you code it (mistakes and all). If you add HTML to a text widget and then things start to look wonky, there’s probably a glitch in the HTML. We’ll talk about that later.
Drag it to your sidebar, and click on the triangle to expand it. Now it looks like this:
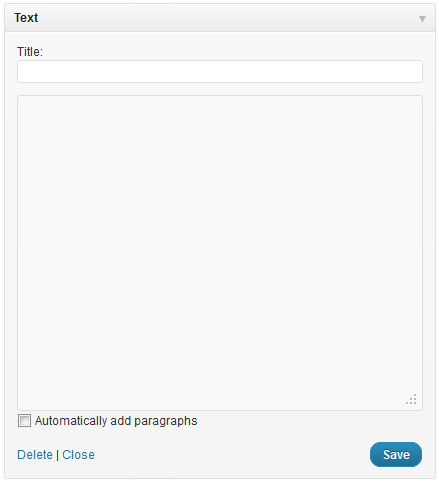
(I’m actually going to make that text box a little smaller so these illustrations aren’t so huge. I can do that by grabbing the group of grey dots in the bottom right-hand corner and dragging it to resize.)
Type “Hello!” in the title box, and “Thanks for visiting my blog.” in the text box:
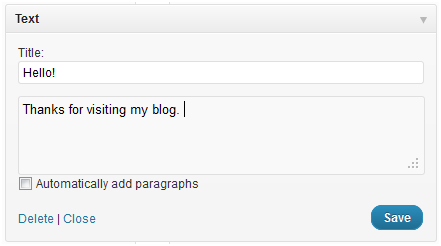
Click the “Save” button. If you want to work on other widgets, you can click “Close” just to tidy things up a little bit. Then visit your site, to see what the widget looks like:

How this ultimately ends up looking depends on the theme you are using. I am using the Graphene theme here, with a few modifications I’ve made using the theme’s custom CSS feature.
You don’t have to include anything in the title, by the way. If you leave it blank, you get a text widget without a title:

Adding HTML to a Text Widget
If you know a little bit of HTML, you can add that to a text widget just like you did plain text. For example, if you wanted to change up that message above a little bit, you could enter this code into the text box:
Thanks <br> for <br> visiting <br> my <br> blog
which ends up looking like this:*

You could drop the code above into a `span`, and style it to make it red. For example, this code:
<span style="color:red;"> Thanks <br> for <br> visiting <br> my <br> blog </span>
makes your widget look like this:

If you know a bit of CSS, you can really have fun. For example, the following code:
<span style="color:red;">Thanks <br></span>
<span style="color:blue; font-size:200%;text-align:center;">
for <br></span>
<span style="text-align:left;"> visiting
<br></span>
<span style="color:#ff00ff;text-align:center;"> my
<br><br></span>
<span style="text-decoration:underline;color:green;font-size:400%;">
blog</span>
makes your widget look like this:

If you don’t know HTML or CSS, don’t worry; I may do an introductory tutorial about this in the future. (If you would like to see this, drop a comment at the end of this post.)
[notice]Update:
The HTML tutorial is here.[/notice]
* ` ` adds a non-breaking space. This is a clumsy way to move things around and there are all sort of reasons why you shouldn’t do it this way, but that’s a different post. 🙂
Adding an Image to a Text Widget
Okay, this is probably the part you have been waiting for. To add an image, we’re going to use a little bit of HTML to place the image, and then use a bit of CSS to make sure it fits.
First, we need to find an image. You can use one from your media gallery, but I’m going to grab one that I have in my online image folder. It’s a picture of a boy sitting in a tree reading.
To add it, we’re going to use the `<img>` tag. We’ll add this code into the text box of our text widget:
<img src="http://images.kjodle.net/boy_tree_book.jpg" />
Which gives us this on our blog:
As you can see, this image is so wide that it expands out of our widget and even adds a horizontal scrollbar that isn’t nice. (In fact, it’s almost too wide for this post.) We need to use a bit of CSS to control the size of the image. We’ll use the `max-width` property to control the size of the image.
Our code is now:
<img src="http://images.kjodle.net/boy_tree_book.jpg"
    style="max-width:225px;" />
I’m not guessing about the width, because I know that’s about the maximum width for my widgets. If you don’t know, you’ll have to experiment around with it a bit, or peek at your theme’s `style.css` file to find out how wide the widgets are. Anyway, the above code gives us this in our sidebar:
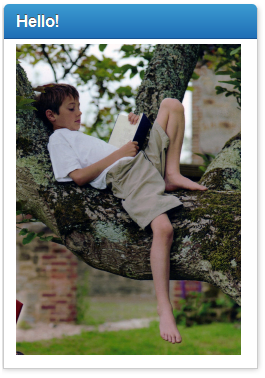
This is an extreme example of course, but I wanted to demonstrate just how powerful a single line of code can be. If I wanted to add a picture that large to one of my sidebars, I would probably resize it using an image-editing program, just to cut down on bandwidth. (Incidentally, there is also a `max-height` declaration, but I didn’t use it here because I was only concerned about the width of the picture. If this were a footer widget, I would also be concerned about the height, as well.)
Adding a Script to a Text Widget
As I mentioned ages ago, the other thing you can add to a text widget is a script. Usually these are affiliate ads or counters, but some of them add amazing functionality to your blog.
The WordPress Codex has a list of these here. It’s probably out of date, because it would be just about impossible to stay on top of all the companies that are making these. But it’s a start.
For example, the flag counter you see at the bottom of my sidebar is code that I got from flagcounter.com. I went to their site, did what I needed to do to get the code, and then copied it. I returned to my widgets pane, pasted it into the text widget, and saved it.
The actual code looks like this:
<a href="http://s01.flagcounter.com/more/XVBV"><img
    src="http://s01.flagcounter.com/count/XVBV/
    bg_FFFFFF/txt_000000/border_CCCCCC/columns_3/
    maxflags_12/viewers_0/labels_0/pageviews_0/
    flags_0/" alt="free counters" border="0"></a>
    <br><a href="http://www.flagcounter.com/">
    Free counters</a>
The important thing here is to copy the entire code. Quite often, people will add this type of code to their site and then weird things will happen, such as their footer disappearing. (This is usually because a closing `</div>` tag is missing.) If that’s the case, drag the widget away from the sidebar, to the “Inactive Widgets” part of the widgets pane (which will keep their settings) , and go back to your page. If everything has gone back to normal, then the code you entered is the problem.
The same is true of adding arbitrary HTML. If the HTML is not absolutely correct, it may cause problems with the rest of your blog.
That’s it for now. If there’s something specific you’d like to see in part two, drop a comment down below and let me know.
https://techblog.kjodle.net/2011/09/12/fun-with-text-widgets-part-one/



Hello! I finally get into your website, well I feel very good this post of yours gave me some ideas. just one question, what is the custom CSS that you used to change the font size of wingets?
PS: Excuse the bad English, I used the google translator
Check this post to see my entire child theme code: http://blog.kjodle.net/2011/08/30/creating-a-child-theme-for-this-blog/
The actual code is:
.sidebar ul li, .sidebar .textwidget p {font-size:11px;
border-bottom: 1px dotted #ddd;
line-height: 14px;
padding: 2px;
}
Thanks! that save a lot of space for my website =3
You’re welcome.
Thank you for such an informative website… Way too much information to absorb in one session.. Good work 🙂
My site is still under construction as I do want it to look something like it should.
Meanwhile, I will not send a builder or joiner around to your house to widen the doorways because I just have to say ‘You’re a genius’! and a HUGE thank you for sharing your knowledge on WP. I was struggling to fit an image in to a side widget and your code worked a treat. Of course it did! I can hear you say. Glad you included the CSS for downsizing it to fit as well. many, many thanks. Muchly appreciated. Mikejduk.
Keep in mind, that’s not the way you should do it.
Just when I was feeling pleased with myself! DOH! Ok, how should I be doing it?
Downsize the pic in a photo-editor like GIMP or Photoshop first. Scaling images using CSS is not a best practice! (I’m thinking I should maybe delete that bit.)
Yes, I have started making it a practise to upload my images in to Photoshop and batch size reduction.
I have seen around here somewhere the instructions for linking a word or image to another website; easy enough in the main body text. But how would I link an image within the widget area to another website? I have tried the html and I have tried the linking the url before it and after the image code. This has led me a consuming dance for some time.
It’s ok, I have it cracked. I cheated by creating a link to an image inside the body text to an external website then copied the code to my widget and altered it to fit the image in my library and the website I wanted it to point to.
Appreciate your help, Ken.