Earlier today, somebody in the Graphene Theme support forum asked about changing the location of the “Next Post” and “Previous Post” links:
I’d like to put the pointers to prev/next posts below a post as well as at the top, preferably between the post and any comments. Is that possible please and, if so, how?
That makes sense: if someone reads to the end of a post and then wants to read the next post, they shouldn’t have to scroll back to the top. Having these navigation links at both the top and the bottom makes your blog more reader friendly.
Fortunately, this is easy to accomplish with Graphene.
Contents
Preliminaries
To accomplish this, we’re going to use:
- a PHP widget plugin
- Graphene’s action hook widget areas
- two WordPress functions: `previous_post_link()` and `next_post_link`
PHP Widget Plugin
WordPress is written in PHP, a scripting language that allows us to create and use functions. We’re going to be adding this code to a widget area, but WordPress doesn’t allow the use of PHP in a widget area, so we’re going to use a plugin that will allow us to do just that.
There are a number of plugins that will allow you do this; I happen to like the WP PHP Widget plugin. I realize that when you visit that page, you get a warning that this plugin hasn’t been updated in two years and may not be compatible with newer versions of things. However, I have looked at the code and it’s pretty simple, and I use it on a number of sites with no issues. It just works. But if you want to use another one, you should get the same results.
Note: You will need to install and activate the widget before you start this.
Graphene’s Action Hook Widget Areas
An action hook is basically a shelf (either in WordPress or a theme) that you can set something on. Graphene has a number of them built in. I already wrote about using them in this tutorial. If you know what they are and how to use them, you’re ready to go; if not, you probably want to read that tutorial and come back here.
WordPress Functions
WordPress has two functions that we’re going to use: `previous_post_link` and `next_post_link`. All these do is get the URL of the previous or next post and return it to the web page. (If you want to read up on these function, they have their own pages in the WordPress Codex: previous_post_link and next_post_link.)
Find the Right Code
To test this out, I created a new post and filled it with lorem ipsum nonsense text:
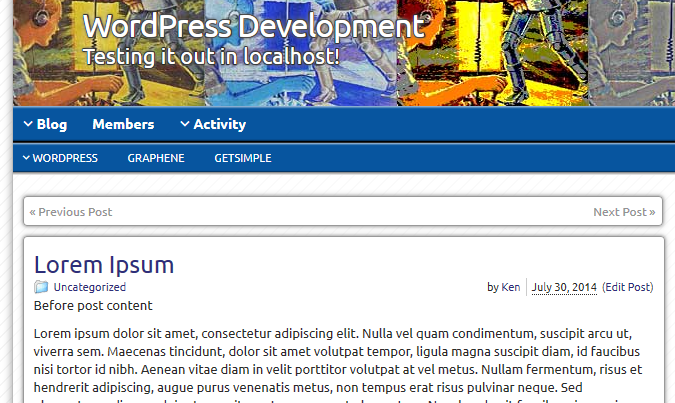
We need to see how Graphene codes the area around those links, so that we can style them the same way. Using my browser’s “View Source” function, I saw this relevant code:
<div class="post-nav clearfix"> <p class="previous">« <a href="http://127.0.0.1/wordpress-dev/2014/05/testing-5/" rel="prev">Testing #5</a></p> <p class="next-post"><a href="http://127.0.0.1/wordpress-dev/2014/08/this-post-has-some-code-in-it/" rel="next">This post has some code in it.</a> »</p> </div>
That’s the code we’re going to use to replicate those links.
Graphene Action Hooks
Under Graphene’s Advanced Options, click on `comments.php` and create a widget area in the `` area:
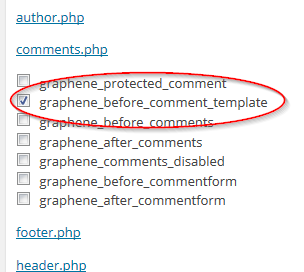
If you want these links elsewhere, you can select a different widget area, but this meet’s the OP’s needs.
PHP Widget
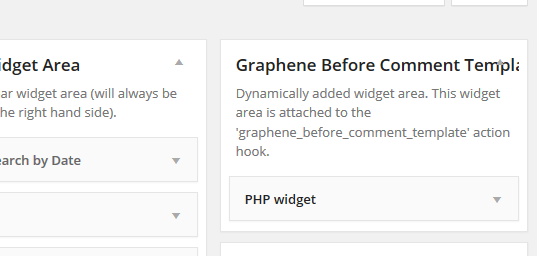
Navigating over to the widgets pane, a new widget area (“Graphene Before Comment Template”) shows up. Drag a PHP widget area over to it:
Code
Here’s where it’s going to get even more simple, because most of the code I showed you above is created by those two WordPress functions.
In the PHP widget box, we’re first going to create that `div` that wraps both the links:
<div class="post-nav clearfix">
Since Graphene wraps each of those links in a paragraph, we’ll do the same thing:
<p class="previous">
Then we’ll add the WordPress function that creates that link. Because this is a PHP function, we need to wrap it in the opening (`<?php`) and closing (`?>`) PHP tags:
<?php previous_post_link(); ?>
All you need to do is add the closing paragraph tag (`</p>`), add the WordPress function for the next post link, and then add the closing div tag (`</div>`). All put together, the code looks like this:
<div class="post-nav clearfix">
	<p class="previous">
		<?php previous_post_link(); ?>
	</p>
	<p class="next-post">
		<?php next_post_link(); ?>
	</p>
</div>
Be sure to click “Save” at the bottom of the widget area.
Results
When I went back to my original post and scrolled down, I saw this:
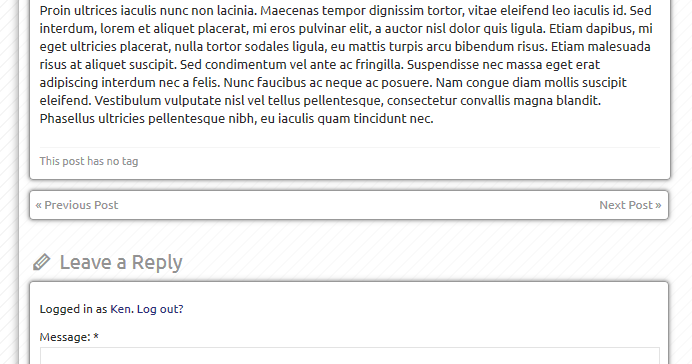
Mischief Managed!
Advanced Topics
If you wanted to style those links differently from the links at the top, you could wrap them in a `<div>` with a CSS class that you could then style as you like. For example, I could use this code instead:
<div class="kjo-post-nav post-nav clearfix">
	<p class="previous">
		<?php previous_post_link(); ?>
	</p>
	<p class="next-post">
		<?php next_post_link(); ?>
	</p>
</div>
Notice that instead of being wrapped in a class called `post-nav`, these links are now wrapped in an additional class called `kjo-post-nav`. (I’ve used my initials here to avoid coming up with a class name that is already used by the theme or by WordPress. I wish all theme authors and plugin authors did this.)
Then, in Graphene’s custom CSS function or in my child theme style sheet, I can define how that class should look:
.kjo-post-nav {
    font-size: 36px;
    }
That will make those links really big. This kind of thing usually takes a bit of experimenting and tweaking, but it is possible. Enjoy.
https://techblog.kjodle.net/2014/10/01/add-post-navigation-links-in-the-graphene-theme-for-wordpress/

Works like a charm. The only tiny little problem is: The bottom navigation links only show when comments are enabled. Not a problem for me, since I leave them enabled anyway; just leaving this message in case someone else faces this problem.