Well, not really. At least not how I tend to think of that word. What really happened is that I found a LaTeX package I like (sim-os-menus) but it didn’t behave the way I wanted it to, so I dug into the source code and figured out how to make it work the way I wanted it to.
sim-os-menus is a great little package. It provides the ability to create application menus, terminal windows, image or pdf viewers, and directory tree structures in a LaTeX document. I knew I would find this useful, because I publish a zine about Linux (created in LaTeX, naturally) and with this plugin I could add more realistic illustrations to it. So I tried out the default Ubuntu-style terminal window with this code:
\begin{TermUnix}[]{}
test@DESKTOP:~$ ping -c 2 ctan.org
PING ctan.org (5.35.249.60) 56(84) bytes of data.
\end{TermUnix}
and got this image:

Not bad, not bad, but I print this zine myself on my Brother HLL2370DW laser printer (a dependable little beast that has served me well) and I don’t want to go through that much toner.
Fortunately, sim-os-menus also loads the tcolorbox package, which means you can use that package’s options to control how your terminal window images look. So I tried this code:
\begin{TermUnix}[Align=flush right, Title=ken@codex]{colbacktitle=gray9, coltitle=black, colback=white, coltext=black}
test@DESKTOP:~$ ping -c 2 ctan.org
PING ctan.org (5.35.249.60) 56(84) bytes of data.
\end{TermUnix}}
and got this result:

Which is exactly what I wanted but I couldn’t figure out what those three dark circles on the left are for. At first I thought that maybe they are part of the OSX terminal window, since OSX is based on Linux, and that pattern may have continued here.
I started digging around in the .sty file, and found this bit of code:
\newcommand{\TermOSXRed}{%
    \begin{tikzpicture}[thick,anchor=base,baseline]
        \filldraw[red] (0,0.25em) circle[radius=0.45em] ;
    \end{tikzpicture}%
}
\newcommand{\TermOSXOrange}{%
    \begin{tikzpicture}[thick,anchor=base,baseline]
        \filldraw[orange] (0,0.25em) circle[radius=0.45em] ;
    \end{tikzpicture}%
}
\newcommand{\TermOSXgreen}{%
    \begin{tikzpicture}[thick,anchor=base,baseline]
        \filldraw[Termosxgreen] (0,0.25em) circle[radius=0.45em] ;
    \end{tikzpicture}%
}
\newcommand{\TermOSXLG}{%
    \begin{tikzpicture}[thick,anchor=base,baseline]
        \filldraw[Termosxgray] (0,0.25em) circle[radius=0.45em] ;
    \end{tikzpicture}%
}
Those are the commands for drawing the close, minimum, and maximize buttons on an OSX style terminal, so I thought that redefining those color definitions would work. I simply renewed those commands by copying them and pasting them into my document, changing newcommand to renewcommand, and changing the color in the filldraw command to match the gray9 I used. (I also loaded the ninecolors package, which I use a lot because it makes things simpler for me.) The new code looked like this:
\renewcommand{\TermOSXRed}{%)
    \begin{tikzpicture}[thick,anchor=base,baseline]
        \filldraw[gray9] (0,0.25em) circle[radius=0.45em] ;
    \end{tikzpicture}%
}
\renewcommand{\TermOSXOrange}{%
    \begin{tikzpicture}[thick,anchor=base,baseline]
        \filldraw[gray9] (0,0.25em) circle[radius=0.45em] ;
    \end{tikzpicture}%
}
\renewcommand{\TermOSXgreen}{%
    \begin{tikzpicture}[thick,anchor=base,baseline]
        \filldraw[gray9] (0,0.25em) circle[radius=0.45em] ;
    \end{tikzpicture}%
}
\renewcommand{\TermOSXLG}{%
    \begin{tikzpicture}[thick,anchor=base,baseline]
        \filldraw[gray9] (0,0.25em) circle[radius=0.45em] ;
    \end{tikzpicture}%
}
That changed exactly nothing. I realized that either the OSX design elements were not part of the Linux design, or that I was targeting the wrong elements. I dug into the .sty file some more. I eventually found this bit of code:
\newcommand{\TermUbuntuWhite}{%
    \begin{tikzpicture}[thick,anchor=base,baseline]
        \filldraw[Termmgray] (0,0.25em) circle[radius=0.5em] ;
    \end{tikzpicture}%
}
It’s using a custom color (Termmgray) which is defined as
\definecolor{Termogray}{RGB}{148,147,141}
but I did not want to mess around with redefining colors in case that would mess something else up down the road. (Always hack with backward compatibility in mind, I suppose.) Instead, I just redefined the entire command:
\renewcommand{\TermUbuntuWhite}{%
    \begin{tikzpicture}[thick,anchor=base,baseline]
        \filldraw[gray9] (0,0.25em) circle[radius=0.5em] ;
    \end{tikzpicture}%
}
and that gave me what I wanted:

Success!
But wait! There’s more!
As it turns out, the three commands that define the minimize, maximize, and close buttons on the right are controlled by this code:
\newcommand{\TermUbuntuMin}{%
    \begin{tikzpicture}[thick,anchor=base,baseline]
        \filldraw[color=Termogray!50!white] (0,0.25em) circle[radius=0.5em];
        \draw[Termterminal](-0.35em,0.25em)--(0.35em,0.25em);
    \end{tikzpicture}%
}
\newcommand{\TermUbuntuClose}{%
    \begin{tikzpicture}[thick,anchor=base,baseline]
        \filldraw[color=Termoorange!70!white] (0,0.25em) circle[radius=0.5em];
        \draw[Termterminal] (-0.32em,-0.07em)--(0.32em,0.57em);
        \draw[Termterminal] (-0.32em,0.57em)--(0.32em,-0.07em);
    \end{tikzpicture}%
}
\newcommand{\TermUbuntuMax}{%
    \begin{tikzpicture}[thick,anchor=base,baseline]
        \filldraw[color=Termogray!50!white] (0,0.25em) circle[radius=0.5em];
        \draw[Termterminal] (-0.32em,0.5em) rectangle (0.32em,0);
    \end{tikzpicture}%
}
I didn’t need to do anything with those, but I did decide to lighten them up a bit by redefining my colors. It’s just that much less toner to go through, which helps out my wallet. I added this to my document:
\renewcommand{\TermUbuntuMin}{%
    \begin{tikzpicture}[thick,anchor=base,baseline]
        \filldraw[gray8] (0,0.25em) circle[radius=0.5em];
        \draw[Termterminal](-0.35em,0.25em)--(0.35em,0.25em);
    \end{tikzpicture}%
}
\renewcommand{\TermUbuntuClose}{%
    \begin{tikzpicture}[thick,anchor=base,baseline]
        \filldraw[red8] (0,0.25em) circle[radius=0.5em];
        \draw[Termterminal] (-0.32em,-0.07em)--(0.32em,0.57em);
        \draw[Termterminal] (-0.32em,0.57em)--(0.32em,-0.07em);
    \end{tikzpicture}%
}
\renewcommand{\TermUbuntuMax}{%
    \begin{tikzpicture}[thick,anchor=base,baseline]
        \filldraw[color=gray8] (0,0.25em) circle[radius=0.5em];
        \draw[Termterminal] (-0.32em,0.5em) rectangle (0.32em,0);
    \end{tikzpicture}%
}
I’ll put the original on the top and the new one on the bottom here:

The difference is subtle and I’m actually making the grey ones a bit darker and the red one a bit lighter, so I’m not sure that I’m saving any toner here at all. (The ninecolors package makes things easy because you can avoid CMYK or HTML descriptions of colors, but that makes it an axe, not a scalpel. Normally, I’m good with the axe as my need for colors in LaTeX is limited.) But as a proof of concept, it works.
Lessons Learned
The first thing to learn here is that most things are possible if you are willing to take the time and energy to figure them out. This little “hack” took me about two hours in total, and I was doing other things in between.
But also, the sim-os-menus is a fairly compact package with a limited number of features. The entire .sty file runs to just 1,137 lines. So I hedged my bet a little bit by choosing a package that is not huge.
Also, as with all things, take good notes. I may never have any use for a fake image viewer image in a zine (or indeed in anything), but it’s nice to know that it’s there if I need it:
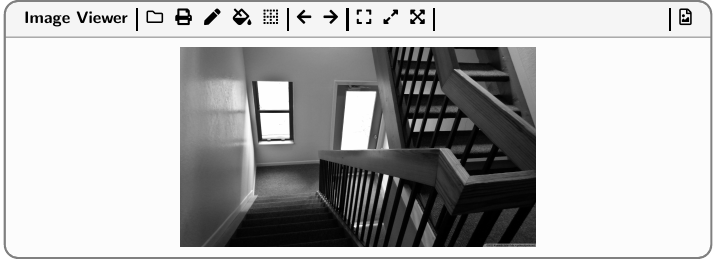
That image is from my gallery, if you are interested. Feel free to explore.
One last point: I still don’t know what those three circles are for. If I ever get the chance, I may email the author of that package to find out, but life is busy and I forget things like that. So I may never know. Sometimes you have to embrace the ambiguity of life.
https://techblog.kjodle.net/2026/07/06/hacking-a-latex-package-sim-os-menus/