Although I like Macs and I love Ubuntu, I spend most of my time in a Windows environment, because most of the people I work with use Windows. I need to see what they see and see it how they see it. So, Windows it is.
Windows is not a bad place to do web development, actually, but you do need to develop some different workflows. Making commits to a Subversion repository is generally accomplished via the command line. If you prefer a GUI alternative in Windows, TortoiseSVN is the way to go. Here’s the workflow I use.
Contents
Setting Things Up
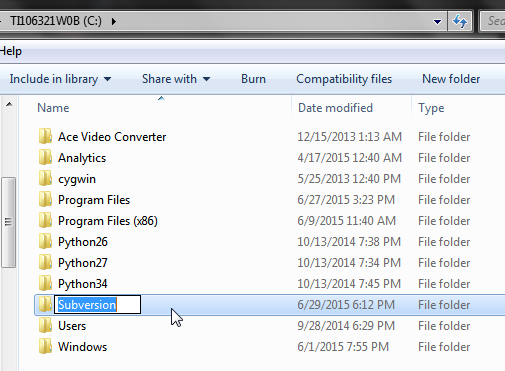
You need some place to set up your repository, as well as to host your files. I chose the root of my `C:` directory, because it’s both out of the way and yet easy to get to. Let’s create a new folder there and call it “Subversion”:
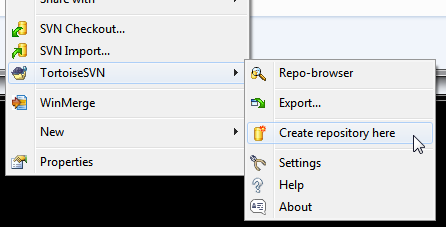
Open that folder, and right-click. In the TortoiseSVN sub-menu, select “Create respository here”:
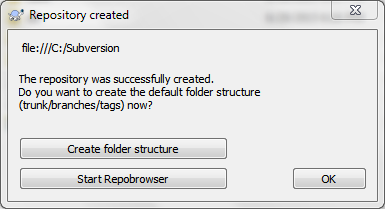
TortoiseSVN will create a repository and then ask you if you want to create the default folder structure. You do. Click on “Create folder structure” and then click “OK”:
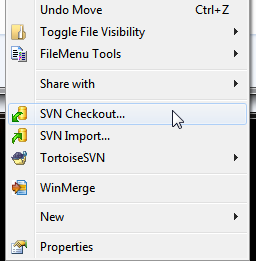
The next step is to grab a copy of your files form the online repository. Right click in the folder, and select “SVN Checkout…”:
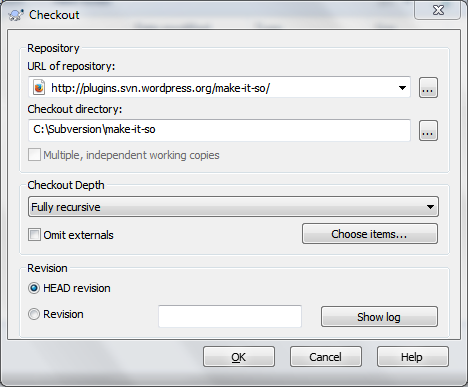
You’ll need to specify the URL of the repository. In this case, I’m grabbing one of my WordPress plugins to work on, so I enter that address in “URL of repository:”. To make my life easier, I’m going to keep my ready-to-go files in this same directory, so for “Checkout directory:” I’m going to select the same folder (“Subversion”) and create a folder with the same slug as my plugin:
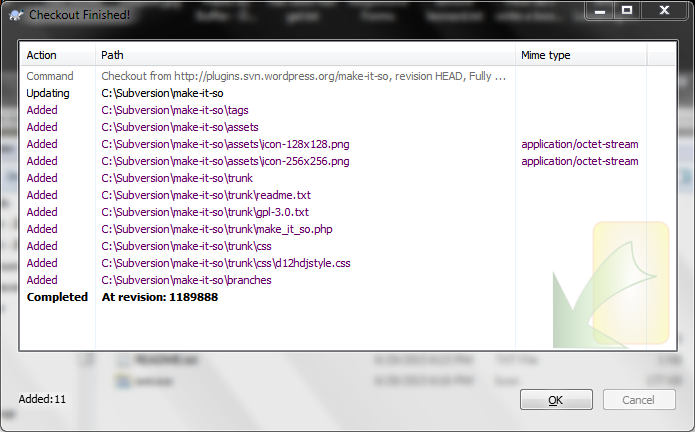
After being prompted for my login credentials and entering them, TortoiseSVN will grab a set of those files:
Looking in the Subversion folder now, we’ll see that new folder:
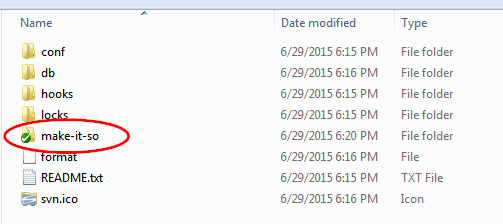
Opening that folder, we’ll see the folder setup the online repository uses. Here’s how WordPress arranges things:

Those green arrows mean that our local copy matches what’s on the server. But the point is that we need to make some changes. Let’s look at that next.
Updating Your Files
Okay, let’s update some files.
WordPress uses the “assets” folder to hold files it uses to display plugin information on its website, but which the plugin doesn’t need to function. These are the banner images (an example of which you can see here) and the icon images (which you can see here). My “Make It So” plugin already has icons, but I need to add a banner.
I created the banner image in GIMP, and moved it to the “assets” folder:
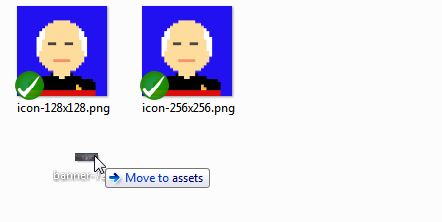
Now everything looks like this:
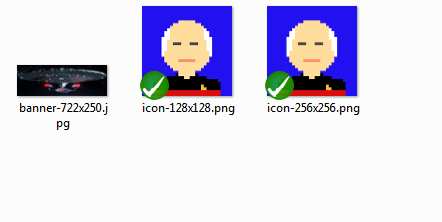
Again, the green arrows on my icon files means that those are the same files as in the online Subversion repository.
The problem now is that nobody knows about that banner image. Our next step is to tell TortoiseSVN that it exists. We do that using the “Add” command.
Right-click on the image and select “Add” from the TortoiseSVN submenu:
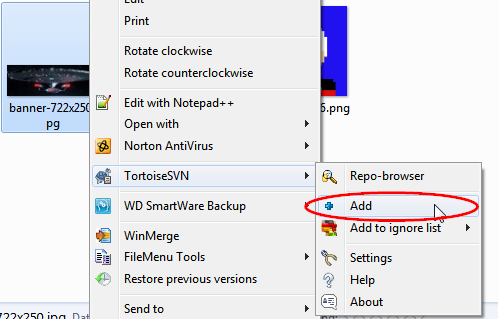
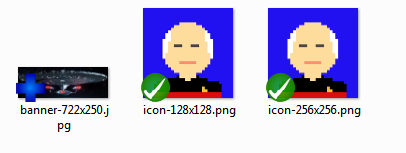
Once we’ve done that, our banner icon now has a blue plus sign on it. That means that it’s been added to our local repository.
If we back out of that folder, we now see this:

The “assets” folder now has an icon of a red circle with an exclamation point. This icon means that this folder has local changes that have not yet been committed to the online repository.
Important!
This icon will not change if you don’t first add items to the local repository using the “Add” command. If your commits fail, make sure that you have added the relevant items to your local repository first.It’s time to commit those changes. We’ll right-click on that folder and select “SVN Commit…” from the contextual menu:
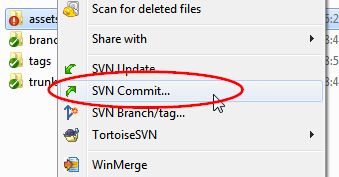
I didn’t need to back all the way out of that folder, btw. I could have committed that file just after I added it:
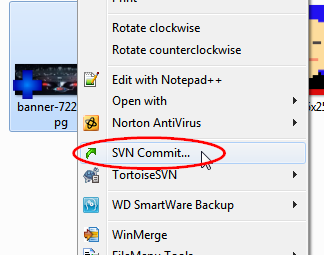
(There’s an important difference between the two which I will explain later, however.) Either way, TortoiseSVN will prompt us to confirm our commit:
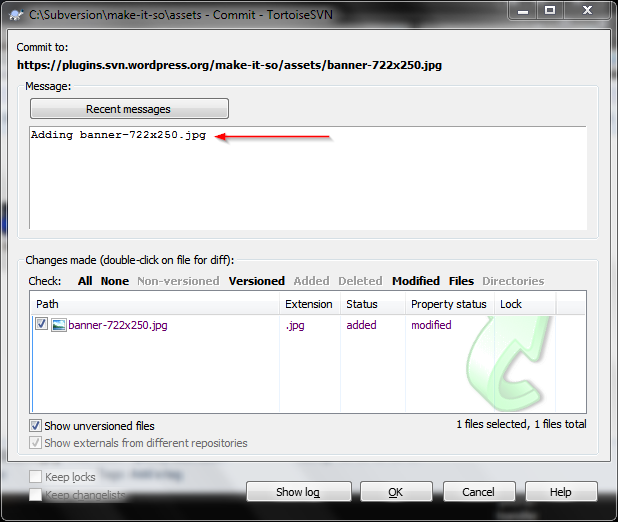
Most of that window should be self-explanatory.
Important!
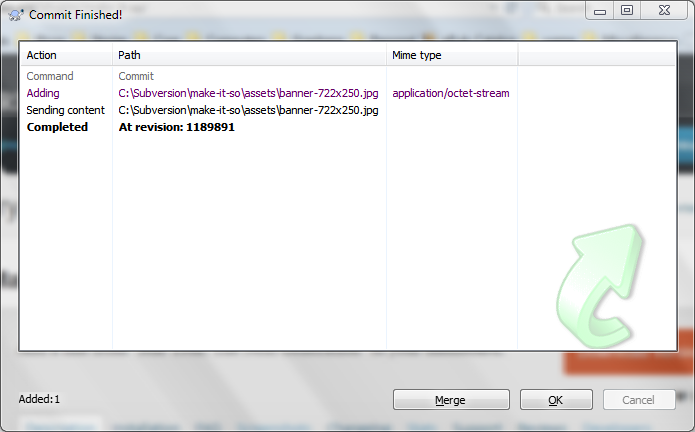
Be sure to enter a note in the “Message:” block about what you are committing. I’m not sure if it’s a WordPress requirement or a TortoiseSVN requirement, but commits will fail unless you add a message here. This information will show up on your WordPress profile, so try to make it something meaningful. (You can also use this message to shamelessly promote, such as “Upgrading to version 2.1; added 3 new features, squashed 2 bugs”.)TortoiseSVN will show you a progress window. This is what it looks like when it’s all over:
Looking at the local copy of the “assets” folder, the banner image now has the green arrow icon, meaning that the local copy and the online copy are in sync:
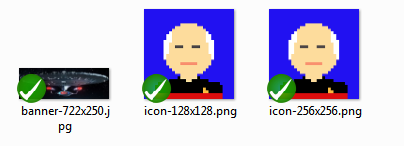
We can verify this easily. Peeking at the online Subversion repository, my assets folder used to look like this:
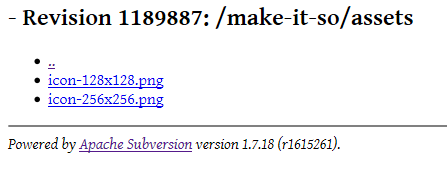
and now it looks like this:
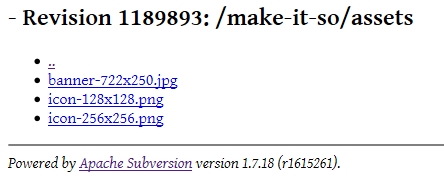
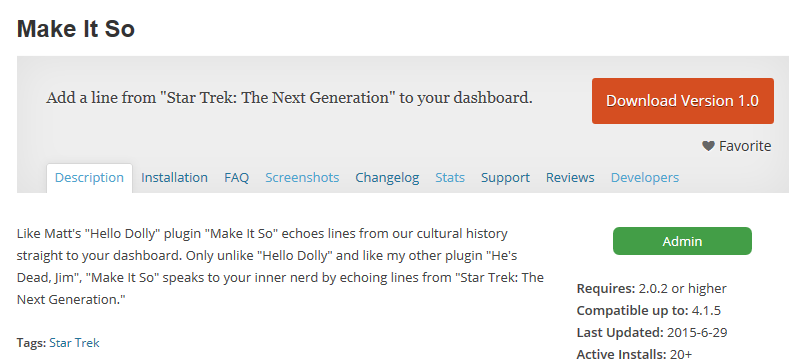
And my plugin page, that used to look like this:
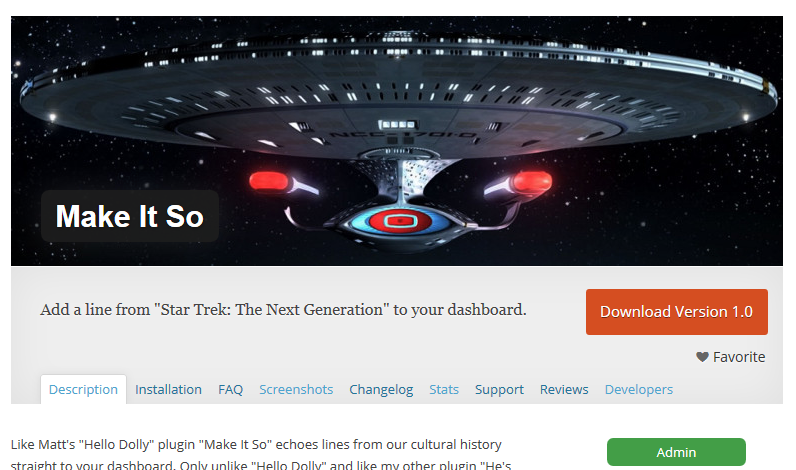
now looks like this:
Mischief managed!
Deleting Files
Earlier, I said that if you add files, you can either commit the individual files, or you can back out and commit the entire folder. As long as you are adding files, there’s really no difference.
Sometimes, however, you need to delete files from the online repository. In that case, you need to remove your files from the local folder, and then back and commit the entire folder.
In the above example, my changes were not taking effect. As it turns out, I had both sized the banner image and named it wrong. (It should have been `banner-772×250.jpg` and I named it `banner-722×250.jpg`.) I deleted my original banner images (I tried both a `.jpg` version and a `.png` version), created a new banner image, in the correct size and with the correct name, dragged it to my “assets” folder, and added it to my local repository using the “Add” command. But I didn’t commit the file, because I had removed those two files. I wanted to make sure that those files would get deleted from the online repository as well. In that case, I have no choice but to back out one level and commit the entire “Assets” folder
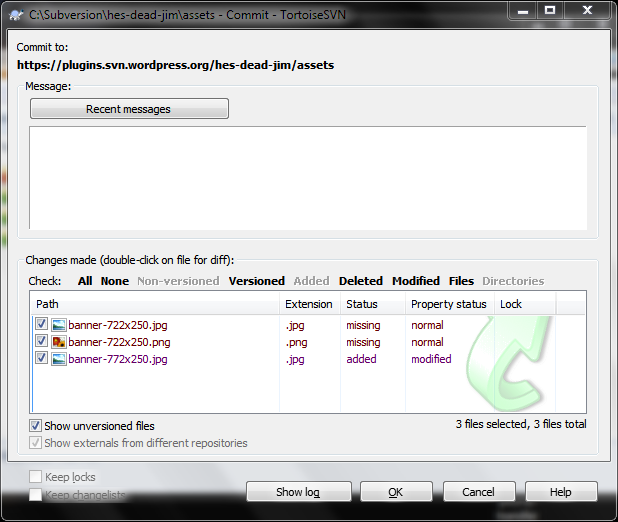
because it’s the only way to delete those files from the online repository. When the I commit the entire “assets” folder, TortoiseSVN shows me this dialogue box:
Notice that my original banner images have a status of “missing”, which means that they will be deleted from the online repository with this commit.
Conclusion
Obviously, there’s a lot I’ve left out here, mostly because I don’t entirely have my head wrapped around version control (yet—I think I see it as more complicated than it really is). I haven’t mentioned switching to a tag or updating the trunk, but if you followed along and understood most of what you read, I think you’ll figure it out. If not, let me know in the comments and I’ll add a tutorial for that.
Of course, it’s quite possible I set up everything wrong from the get-go. All I can say is that this works for me, and I can update my WordPress plugins without any problem.
As always, if you have questions, suggestions, or corrections, please add a comment. Thank you.
A Brief Aside on Attitude
As I said earlier, my original png file didn’t show up on my plugin page. Maybe that .png file is corrupt, I thought. So I saved it as a `.jpg`, added it, and committed it. Still nothing. Maybe the server just needs time to update, I thought. I made a salad, ate it, and checked again. Still, no banner. I had a bowl of ice cream and checked it again. Still nothing.
It is a poor worker who blames his tools. I could have blamed WordPress or TortoiseSVN. I could have gone on a forum and complained that it didn’t work and begged for a fix, or I could have just said “forget it, who cares anyway?”
Well, I care.
The mindset of a problem-solver is too busy seeking for solutions to place blame. If other people can do this, so can I. (In fact, one of those “other people” was me, since I got this to work just fine on my other plugins.) That leads to the question “What did I do wrong?”
Sometimes software and hardware doesn’t work. The WordPress server could have had some sort of update glitch, or TortoiseSVN or GIMP could have corrupted my file. But the chances of that happening are extremely low, meaning the chances that it’s something I did are extremely high.
I went through the documentation on WordPress plugin banner images with a fine-toothed comb and discovered that I had named my banner images wrong. It’s a rookie mistake, but here I am, having worked with computers since I was a little kid, and still making them. Even if you know what you’re doing, it’s still possible to make mistakes. Probable, even.
Learn how to figure out where you went wrong. Make bigger and better mistakes. It’s how we learn.
https://techblog.kjodle.net/2015/06/30/subversion-on-windows-a-tortoisesvn-workflow/
