I recently started using WebFaction as my main webhost. They are more reliable and cheaper than my old webhost, and like my old host, they have a custom panel—they do not use cPanel. Nothing against cPanel, but I’m not a big fan of cookie-cutter hosting options.
One thing I like about WebFaction is their hosting model:
website = domain + application
I could say more about this, but let’s look at a practical example of how this works out by installing Moodle.
What makes Moodle troublesome for some people is that it stores its data in a separate directory (called, naturally, moodledata) that cannot be publicly accessible. (It’s a security risk if it’s publicly accessible.) The usual solution to is to place it one level about your web root, where Moodle can get to it, but nobody else can. On most web hosts, your directory structure would look like this:
user/
    -moodledata/
    -public-html/
         -moodle.example.com/
On WebFaction, all your applications go into a directory called webapps. Unfortunately, you don’t have direct access to the webapps directory on shared hosting, so you need a workaround. The solution is a two-step one: first, create a webapp that holds both your moodle and moodledata directories, and second, create a symlink application to the moodle directory. Your Moodle website model will be this:
Moodle website = domain + symlink application
Let’s get started!
Notice!
This tutorial assumes that you know how to login to your website via the command line. Even if that’s all you know how to do, however, I’ll provide you the exact commands you’ll need.Contents
Create the Moodle Application
Head over to the Applications tab of your WebFaction panel and click on the “Add new application” button.
Give it a unique name, select “PHP” for the Application category, and select “Static/CGI/PHP-7.0” for the App type:
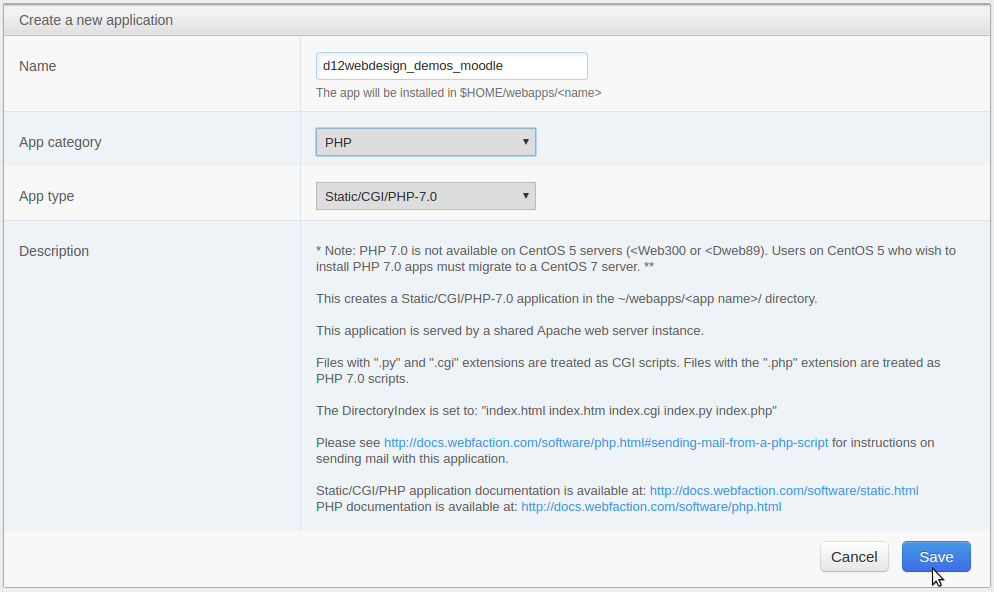
Click “Save” to create the application.
Grab the Moodle Files
You can download the Moodle package, unpack, and upload the files via FTP, but that takes forever. (FTP is a notoriously slow protocol.)
Instead, we’ll login to our WebFaction account via the command line and and use wget to transfer the files directly from the Moodle site to ours.
Let’s change directories to the application we created on the WebFaction panel:
cd webapps/d12webdesign_demos_moodle
Let’s grab the file we need using wget:
wget https://sourceforge.net/projects/moodle/files/Moodle/stable32/moodle-latest-32.tgz
Doing a quick ls on that directory should show us:
index.html moodle-3.2.1.tgz
We don’t need that index file, so let’s get rid of it:
rm index.html
Let’s unpack that Moodle archive:
tar -xzf moodle-latest-32.tgz
We don’t need that archive file anymore, so we can get rid of it:
rm moodle-latest-32.tgz
A quick directory listing shows us that our newly created Moodle directory is the only thing there:
username$ ls
moodle
Back to the WebFaction Panel
We need to head back to the WebFaction Panel to do three things. First, we need to create a database for Moodle. Second, we need to create a symlink app to the moodle directory we just created. Third, we need to create the website itself.
First, a Database
Click on the “Databases” link, and then click on the “Databases” tab underneath. Then click on the “Add new database” button.
Give your new database a unique name, selected “MySQL” for “Database Type” and then, for security purposes, create a new database user:
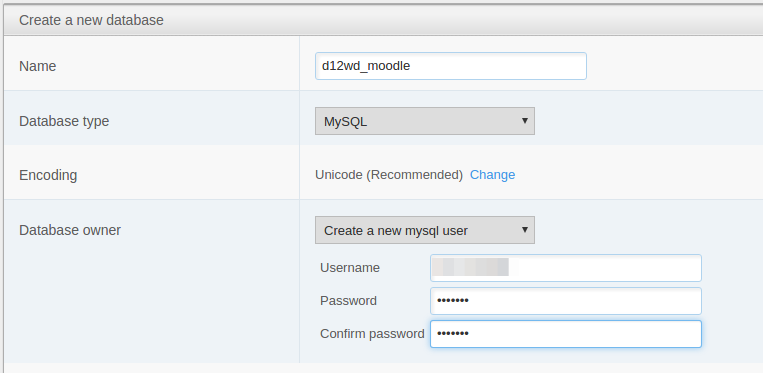
Be sure to write down the username and password somewhere secure, as you will need it later. (I just copy and paste it into a text file which I close without saving when I’m done.)
Second, a Symlink
Click on “Domains/Websites” and then click on the “Applications” tab. Click on the “Add new application” button.
Give your app a unique name. In this case, since my original Moodle app is called “d12webdesign_demos_moodle”, I’ll call my new app “d12webdesign_demos_moodle_symlink”. This helps to keep things straight in my mind when I create the actual website.
For “App category” select “Symbolic link”:

So far, so good. Now we need to tell that app what it’s linking to. Scroll down to the “Extra info” field at the bottom:
This is where you will enter the absolute path from your /home directory. It will be something like /home/username/webapps/moodle_app/moodle/

Click the save button and your symlink app is ready to go.
Last but not least, a website
You probably know how to do this by now, but let’s run through it so you can avoid a potential mistake here.
Click on the “Websites” tab, and then click on the “Add new website” button.
Give it a name, choose whether you want security or not, make sure it’s enabled, and select the domain you want to run it under. (In my case, I’m installing it in a subdomain of a pre-existing website.)
For “Contents” select “Reuse an application” and then select the symlink application we just created:
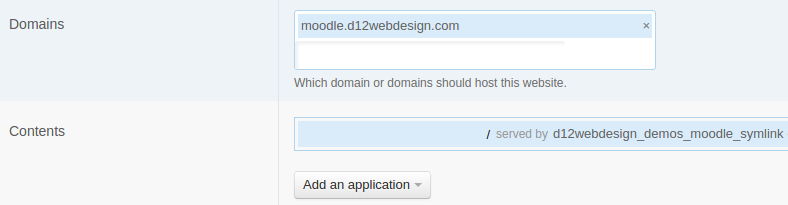
Don’t select the original Moodle app itself, which is what we are used to doing. This is the one spot where people tend to make a mistake.
Install Moodle
That’s it. Head over to your site and begin the Moodle installation:
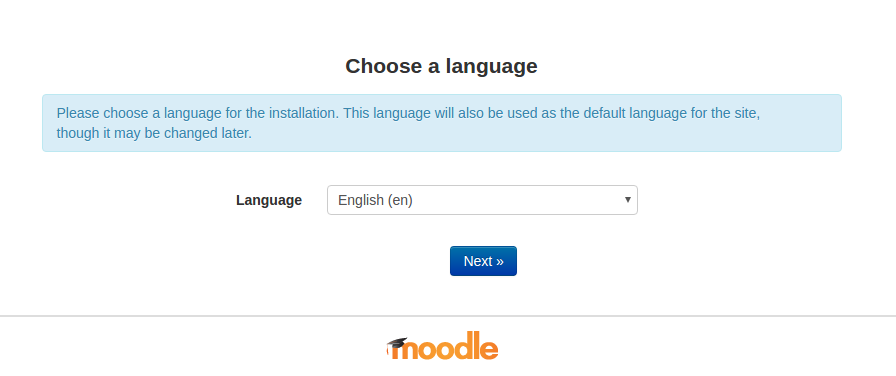
From this point on, you can complete the installation in your web browser. It takes Moodle a few minutes to set things up, so get a cup of coffee or tea, and prepare to set aside five to fifteen minutes, depending on how fast your server is. You’ll need that database user and password that you wrote down earlier.
BTW
The official instructions for installing the latest version of Moodle are here. You don’t need to worry about creating the moodledata directory, or changing ownership or permissions on any files.
If you have any questions or comments, please feel free to write a comment.
https://techblog.kjodle.net/2017/02/18/installing-moodle-on-webfaction/
