OCR (optical character recognition) is a powerful (although imperfect) tool for getting data out of scanned images and documents. As it turns out, it’s possible to do in Linux from the command line without too much trouble.
The main tool you will need is tesseract 1. You can install it with this command:
sudo apt install tesseract-ocr
Tesseract works on images, so once you have it installed, you can use it from the command line like this:
tesseract input.png output
tesseract input.jpg output
Note that tesseract will automatically add a file extension.
If you are working with a pdf, you have a couple of options. First, you could convert your pdfs to images using something like imagemagick:
magick input.pdf output.png
and then use tesseract as described above.
Second, you could use ocrmypdf2 to add an OCR text layer to your pdf (this is handy if you want to distribute a pdf that people can copy and paste text from) and then use pdftotext (from the poppler-utils package), to copy that OCR text layer to a text file. To install them, just use:
sudo apt install ocrmypdf && sudo apt install poppler-utils
and then use them like this:
ocrmypdf input.pdf output.pdf
pdftotext output.pdf output.txt
Easy-peasy.
Contents
Testing
To test these out, I found an old Army Corps of Engineers manual and saved this page as a pdf:
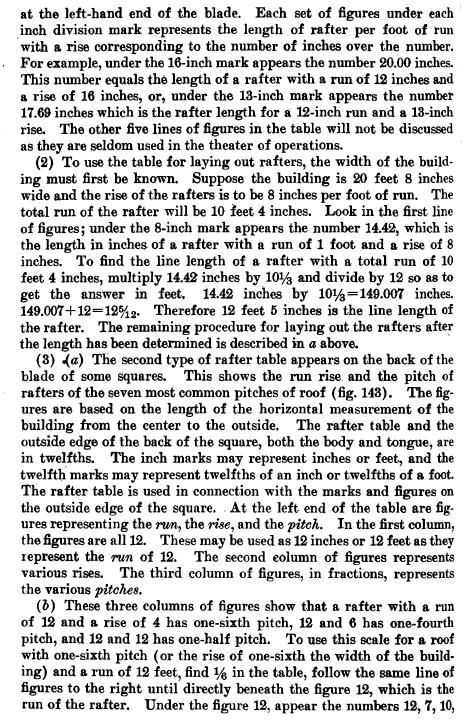
I then ran this series of commands:
magick 1.pdf 2.png
tesseract 2.png 2
ocrmypdf 1.pdf 3.pdf
pdftotext 3.pdf 3.txt
This is pretty straightforward to understand:
- Line 1 converts the pdf to an image file so that we can test both methods.
- Line 2 uses tesseract to OCR the image file.
- Line 3 uses ocrmypdf to add an OCR text layer to our pdf.
- Line 4 then uses pdftotext to extract that OCR text layer to a file.
The results were not quite the same. I used the wc -w command on each file to get a word count and 2.txt contained 558 words and 3.txt contained 562 words.
Here’s the contents of 2.txt:
hand end of the blade. Each set of figures under each
inch division mark represents the length of rafter per foot of run
‘with a rise corresponding to the number of inches over the number.
For example, under the 16-inch mark appears the number 20,00 inches.
‘This number equals the length of a rafter with a run of 12 inches and
1 rise of 16 inches, or, under the 13-inch mark appears the number
17.69 inches which is the rafter length for 12-inch run and a 13-inch
rise. ‘The other five lines of figures in the table will not be discussed
as they are seldom used in the theater of operations.

(2) To use the table for laying out rafters, the width of the build-
ing must first be known, Suppose the building is 20 feet 8 inches
wide and the rise of the rafters is to be 8 inches per foot of run, ‘The
total run of the rafter will be 10 feet 4 inches. Look in the first line
of figures; under the 8-inch mark appears the number 14.42, which is
the length in inches of a rafter with a run of 1 foot and a rise of 8
inches. To find the line length of a rafter with a total run of 10
feet 4 inches, multiply 14.48 inches by 1014 and divide by 12 so as to
get tho answer in feet. 1442 inches by 10%4=149.007 inches,
149.007 +12= 19%». Therefore 12 feet 5 inches is the line length of
the rafter. The remaining procedure for laying out the rafters after
the length has been determined is described in a above.

(8) a) The second type of rafter table appears on the back of the
blade of some squares. This shows the run rise and the pitch of
rafters of the seven most common pitches of roof (fig. 148). ‘The fig-
ures are based on the length of the horizontal measurement of the
building from the center to the outside. The rafter table and the
outside edge of the back of the square, both the body and tongue, are
in twelfths, ‘The inch marks may represent inches or feet, and the
twelfth marks may represent twelfths of an inch or twelfths of a foot.
‘The rafter table is used in connection with the marks and figures on
the outside edge of the square. .At the left end of the table are fig-
ures representing the run, the rise, and the pitch. In the first column,
thofigures are all 12. ‘These may be used a8 12 inches or 19 feet as they
represent the run of 12. The second eolumn of figures represents
various rises. The third column of figures, in fractions, represents
the various pitches,

(8) These three columns of figures show that rafter with a run
of 19 and a rise of 4 has one-sixth pitch, 12 and 6 has one-fourth
pitch, and 12 and 12 has one-half pitch. To use this scale for a root
with one-sixth pitch (or the rise of one-sixth the width of the build-
ing) and a run of 12 feet, find % in the table, follow the same line of
figures to the right until directly beneath the figure 12, which is the
run of the rafter, Under the figure 12, appear the numbers 12, 7, 10,
and here’s the content of 3.txt:
at the left-hand end of the blade. Each set of figures under each
inch division mark represents the length of rafter per foot of run
with a rise corresponding to the number of inches over the number.
For example, under the 16-inch mark appears the number 20.00 inches.
This number equals the length of a rafter with a run of 12 inches and
a rise of 16 inches, or, under the 13-inch mark appears the number
17.69 inches which is the rafter length for a 12-inch run and a 13-inch
rise. The other five lines of figures in the table will not be discussed
as they are seldom used in the theater of operations.
|
(2) To use the table for laying out rafters, the width of the build-

ing must first be known.

Suppose the building is 20 feet 8 inches

wide and the rise of the rafters is to be 8 inches per foot of run.

total run of the rafter will be 10 feet 4 inches.

The

Look in the first line

of figures; under the 8-inch mark appears the number 14.42, which is
the length in inches of a rafter with a run of 1 foot and a rise of 8

inches.

To find the line length of a rafter with a total run of 10

get the

answer

feet 4 inches, multiply 14.42 inches by 1014 and divide by 12 so as to

149,007 +12=12545.

in

feet.

14.42

Therefore

inches

by

1014=149.007

inches.

12 feet 5 inches is the line length of

the rafter. The remaining procedure for laying out the rafters after
the length has been determined is described in a above.
(3) {a) The second type of rafter table appears on the back of the
blade of some squares.
This shows the run rise. and the pitch of
rafters of the seven most common pitches of roof (fig. 148). The figures are based on the length of the horizontal measurement of the
building from the center to the outside.
The rafter table and the
outside edge of the back of the square, both the body and tongue, are
in twelfths.
The inch marks may represent inches or feet, and the
twelfth marks may represent twelfths of an inch or twelfths of a foot.
The rafter table is used in connection with the marks and figures on
the outside edge of the square. . At the left end of the table are figures representing the rwn, the rise, and the pitch. In the first column,
the figures are all 12. These may be used as 12 inches or 12 feet as they
represent the rwn of 12.
The second eolumn of figures represents
various rises. The third column of figures, in fractions, represents
the various pitches.
(6)

These three columns of figures show that a rafter with a run

of 12 and a rise of 4 has one-sixth pitch, 12 and 6 has one-fourth
pitch, and 12 and 12 has one-half pitch. To use this scale for a roof
with one-sixth pitch (or the rise of one-sixth the width of the build-

ing) and a run of 12 feet, find 14 in the table, follow the same line of

figures to the right until directly beneath the figure 12, which is the
run of the rafter. Under the figure 12, appear the numbers 12, 7, 10,
Conclusions
As you can see, it is possible to do OCR rather simply in Linux with just a few simple tools. Your results may vary, of course, depending on the quality of your inputs, and the method you use. In this case, it worked out better to convert our pdf into a .png image first and let tesseract work its magic. I deliberately chose an older image from the internet that was of decent quality, but is probably a lower quality that you can get by scanning documents yourself.
I like having command-line options, as they are faster to me than having to open up a separate application, but if you prefer something with a GUI, I suggest you look at NAPS23, which is a scanning app that has built-in OCR. I’ve used it for several years now and it works great.
Happy scanning!
Links
1https://github.com/tesseract-ocr/tesseract
2https://github.com/ocrmypdf/OCRmyPDF
https://techblog.kjodle.net/2026/09/15/ocr-in-linux/