Warning!
Update 2014.08.06:Kalin’s Post List plugin is no longer being supported. Instead, you can use its successor, the Advanced Post List plugin. That plugin works very similarly to Kalin’s Post List plugin and most of the instructions below are still valid.
One question I often get about WordPress is how to create a list of links to all the posts in a given category. While the most obvious way is to just use the category archive, this has limited options, and to exercise them, you either have to tear into your theme’s core files (meaning that your changes will be lost when the theme gets updated), or create a child theme.
There is an easier way: use the Kalin’s Post List plugin. This plugin will allow you to create lists of posts based on categories or tags, and to control precisely what is displayed and how it is displayed. (Unfortunately, this requires knowing a bit of HTML and CSS, but never fear: I’ll walk you through the basics.) You can then place those lists in any post or page using a shortcode.
Contents
Get the Plugin
You can get Kalin’s Post List plugin from the plugin repository at WordPress, and follow the instructions there, or you can navigate to Plugins >> Add New in your Admin panel and then search for Kalin’s Post List. Install it, and then activate it.
In your Settings pane, there is now an option for “Kalin’s Post List.” Click on it.
Select What to Show
At the top of the the Settings screen for Kalin’s Post List, you should see something that looks like this:
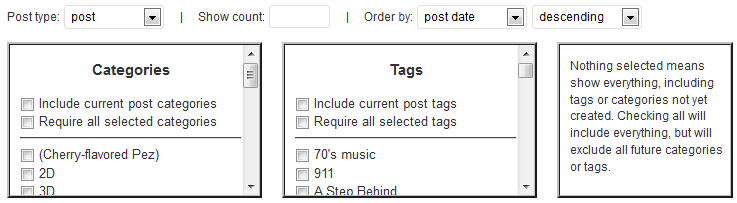
In the “Post type” pop-up menu, you can select from
- posts: these are the standard WordPress posts
- pages: these are the standard WordPress pages
- attachment: these are the pages that are used to display images
- none: see below
- all: includes posts, pages, and attachments
About Choosing “none”
Choosing “none” hides most of the post options, and leaves you just a single box to enter code into. This may seem weird, but this is one of the most powerful aspects of this plugin, because it allows to enter just about any HTML code you like on any page or post just by using a shortcode.
For example, suppose you want to include a small form at different places in different blog posts. Going to Kalin’s Post List settings, you would select none, and see this box:

In the large “List item content” box, you would enter the html for your form:
<form action="" method="">
<table border=0 cellpadding=4 width=80%>
    <tr>
        <td align=right width=35%><p>Your Name: </p></td>
        <td align=left width=65%><input size=40 type=text name="name" /></td>
    </tr>
    <tr>
        <td align=right width=35%><p>Your E-mail: </p></td>
        <td align=left width=65%><input size=40 type=text name="email" /></td>
    </tr>
</table>
<p><input type=submit name="submit" value="Send Message"></p>
</form>
This is dummy code, just to provide an example—clicking on “Submit” won’t actually submit anything. In this case, I’m going to save it as a preset with the name “contact_sample”. I’ll enter the shortcode `post_list preset=”contact_sample”` in this post, and this is what you’ll see:
[post_list preset=”contact_sample”]
[error]Update 2014.08.16: Actually, you won’t see anything other than the shortcode, since that plugin is no longer installed on this site.[/error]
I can now put that contact form anywhere I would like, just by typing that shortcode. You can use this technique to insert any type of HTML: forms, images, etc.
Show Count
Enter the number of posts or pages you would like displayed in this box. If you would like to show all of them, enter “-1”.
Order By
Choose how you would like to order the posts. Your options here are:
- post date: this is the “publication” date (which WordPress allows you to edit, so it is not always an accurate measure of a post’s age)
- author ID: display posts by author
- post ID: this is the actual order posts were created in, as opposed to the post date
- menu_order: still figuring this one out
- parent: still figuring this one out
- random: displays them in random order
- title: displays them by title
You can then select descending (9-1, Z-A) or ascending (1-9, A-Z) order.
Select Tags or Categories (or both!) to Display
To select only certain categories or tags, just scroll through each list and tick the boxes of the ones you would like to include.
“Include current post categories” and “Include current post tags” provide easy ways to create an archive pages, because selecting these options will then create a list of posts containing the categories or tags of the post the shortcode is on. In other words, you can create a very simple shortcode, and then append it to the bottom of every post, where it will then display others posts in the same category or with the same tags as the post you are reading.
“Require all selected categories” and “Require all selected tags” tells WordPress to list a post only if they match all the categories and/or tags you have ticked. Normally, a post matching any of the ticked items will be listed.
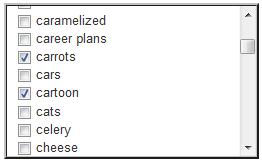 Example:
In the list to the left, I have ticked the box for both the “carrots” tag and the “cartoon” tag. The list of posts that is generated will then include any posts that are tagged either “carrot” or “cartoon”, even if none of them have both tags. By selecting “Require all selected tags,” the post list will only include those posts that are tagged “carrots” and “cartoon”.
Setting Up Your List
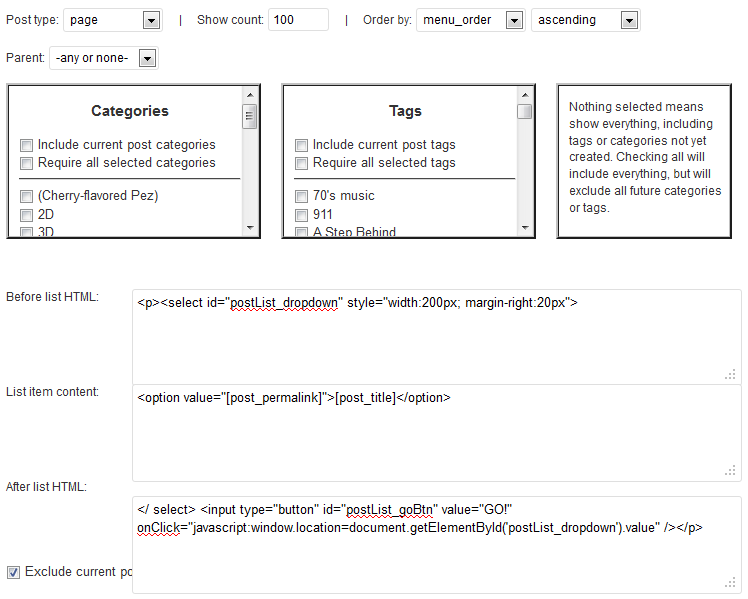
Looking down a bit, you’ll see something that looks like this:
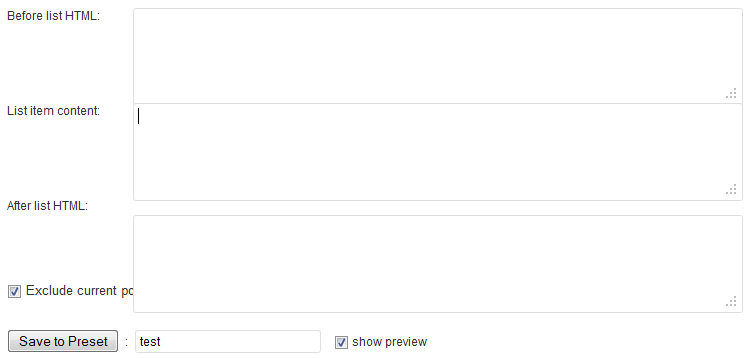
This is where you actually create your posts list. You can do this without knowing very much HTML and with no CSS, but knowing a little bit of each will make your posts lists much more interesting and useful.
“Before list HTML”
This is what is displayed before your posts list. You can include any valid HTML or CSS here, or you can leave it blank. If you intend to use your shortcode more than once, remember that anything you include here will be displayed with every instance of the shortcode, so be careful.
“List item content”
This is the box that controls how each post in your post list is displayed. This is where you will need a bit of HTML. You will also need the shortcodes listed at the bottom of this page. They look like this:
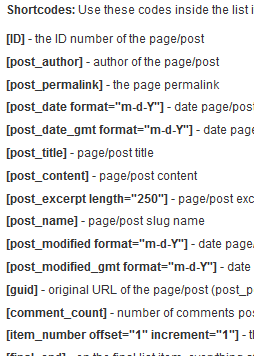
You might want to take a few minutes to look through those, or even print them out, because you will be using them a lot.
I’m going to assume you don’t know any HTML, and provide a few examples of simply ways to generate a list of posts. The first bit of HTML you need to know is how to create a link. Typical link code looks like this:
<a href="http://www.yourblog.com/page.htm">Title</a>
There are two main parts you have to worry about here: the `”http://www.yourblog.com/page.htm”` bit, which is where your readers will go when they click on the link (don’t forget the quotation marks), and the `Title` bit, which is what people will actually see and click on.
To make this work with Kalin’s plugin, you’ll need to make use of the shortcodes at the bottom of the page I mentioned earlier. Perusing that list, there are two shortcodes we really need: [post_permalink] and [post_title]. We’re going to put them in our code so that the plugin will generate actual links:
<a href="[post_permalink]">[post_title]</a>
Unfortunately, what’s going to happen if we just use that code above is that all of our posts will just appear one after the other on the same line, without any formatting. We have a couple of options here. We can use the paragraph tag (<p />) in front of each link to put each link on its own line, giving us code like this:
<p /><a href="[post_permalink]">[post_title]</a>
Or we can use the list item tag (<li />) to create a bulleted list of links:
<li /><a href="[post_permalink]">[post_title]</a>
We can fancy this up by using other shortcodes from the bottom of the page. Most of them are self-explanatory. For example, this code:
<li><a href="[post_permalink]">[post_title]</a> ([post_date format="m-d-Y"])
 - [comment_count] Comments<br />[post_excerpt length="90"]</li>
Will generate a list of posts that looks like this:
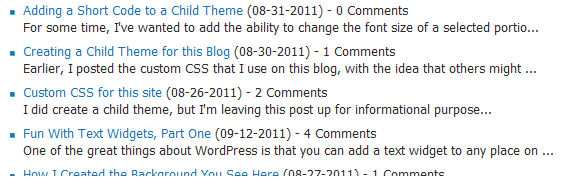
Like I said, most of those shortcodes are fairly self-explanatory:
- [post_date format=”m-d-Y”] shows the date the post was published in month-day-year format.
- [comment_count] shows the number of comments. Because this number would be fairly meaningless on its own, I had to include ” Comments” (remembering the space) right after it.
- [post_excerpt length=”90″] shows a 90-letter excerpt from each post. You can change the length to whatever you like, but keep in mind that 90 letters is 90 letters, and as you can see from the example above, it will cut off in the middle of a word. (To show the entire post, use the [post_content] shortcode instead.)
“After list HTML”
Again, this is similar to the “Before list HTML”. Anything you include here will appear at the bottom of the post list each time you use the shortcode.
Save to Preset
First, tick the box marked “Exclude current post from results”, which will prevent the page the shortcode appears on from being included in the list. (That would just be weird.)
Next, enter a short name in the box next to the “Save to Preset” button. This will be the actual shortcode you end up using, so make it short, unique, and memorable.
If you tick the box marked “show preview”, a preview of the shortcodes output will appear just under this area after you save the preset. This allows you to make changes and adjust your coding as you go, without having to add it to an actual page or post first and then going back and forth from the settings to the actual page.
Using Presets
Just above that list of shortcodes is a list of preset shortcodes. It looks like this:

Shortcodes #0-10 ship with the plugin, and #11 and #12 are ones that I have created. To use these, just copy the shortcode and paste it anywhere in a page or post you would like the list of posts to appear. For example, I have a page that looks like this when I edit it:
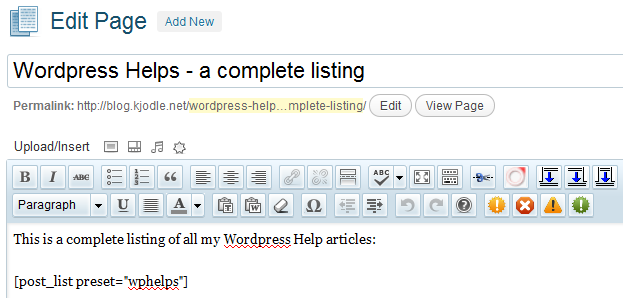
and when viewed generates the post list I included a screen snippet of up above.
Any shortcode you save will appear in this list. If you create a shortcode and want to delete it later, or want to delete any of the presets that ship with the plugin, just click on the “Delete” button.
If you click on the “Load” button next to any of the presets, the plugin loads the data for that plugin and you can scroll up and take a look. For example, if I load the [pagedropdown_100] preset, the values above change to:
I can then change any of the values and create a new preset. So if you find one of the presets that you like but just needs a bit of tweaking, this is the way to do it. Just load it, make your desired changes, and then enter a new name in the “Save to Preset” box.
Matching Excerpts to Your Theme’s Style
You may want to use Kalin’s Post List plugin to make a pseud0-archive: something that looks like an ordinary archive, but over which you have a greater ability to include text or other items above and below, and to limit the length of the excerpt or even eliminate it altogether. Basically, you want to make every item in the post list look like an individual post.
This is fairly straightforward, although it will take a fair amount of tweaking.You will also want to take a close look at your theme’s stylesheet, and be somewhat knowledgeable about the CSS that you see there.
First, we are going to use the “Before list HTML” to open a <div> and style it so that it looks like the main content area of your theme. In my case, I entered this text:
<div style="background:url('http://blog.kjodle.net/wp-content/
uploads/2011/08/Stones-in-water.jpg') fixed; padding:12px;
margin:-15px;">
I then closed the <div> in the “After list HTML” by including [code]</div>[code].
Within the “List Item Content” area, I then included a <div> and styled it so that it mimicked my theme’s entries. My code looks like this:
<div style="margin:auto; width:90%; padding:10px;">
<div style="margin-bottom:12px;">
<h1><a href="[post_permalink]">[post_title]</a></h1>
<p> ([post_date format="m-d-Y"]) - [comment_count] Comments</p>
<p>[post_excerpt length="400"]</p>
</div></div>
This code gave me something that looked like this:
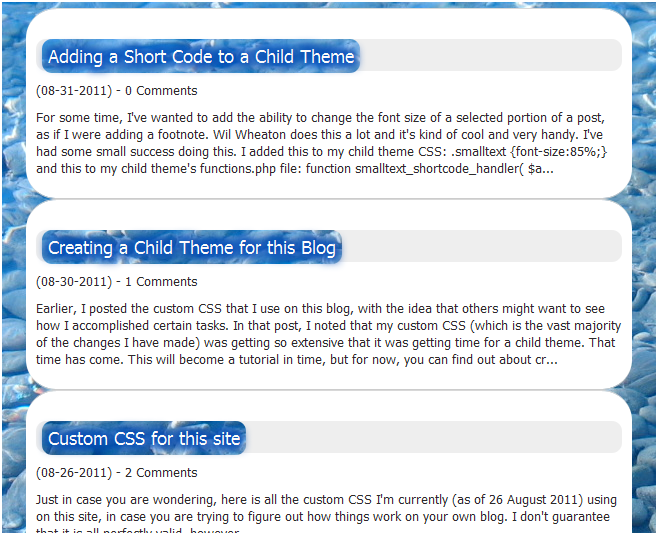
It’s not quite perfect, but I didn’t want to spend too much time figuring this out. My main goal was to show that it is possible. With a bit more tweaking, I could make everything look exactly like regular posts.
Need More Help?
The plugin’s home page is here, and the help page is here.You can always try the help forum there.
If you have other questions or concerns, feel free to drop a comment and I’ll see what I can do.
https://techblog.kjodle.net/2011/10/30/kalins-post-list-a-brief-tutorial/
