This is a very basic introduction to Cascading Style Sheets. The intended audience is people who know a little bit about HTML and absolutely nothing about CSS. If you are foggy on HTML, you should read “HTML—A Very Basic Introduction” first.
Contents
Basics
CSS stands for “Cascading Style Sheets”. It’s a language for controlling the appearance (i.e., the presentation) of a website. It does not control the content of a website (that’s the job of HTML, although CSS can do a bit of that) or the behavior of a website (which is the job of JavaScript, although CSS can do a bit of that as well).
Current web standards dictate that the content, appearance, and behavior or a website be kept separate. If you are accustomed to using HTML tag attributes to format your web page (in other words, if you write HTML like this: <P COLOR="BLUE">) you need to start using CSS instead.
Rule Sets
99% of CSS consists of rule sets: rules that describe how HTML elements should appear. A CSS rule works like this:
- pick an HTML element
- select a property of that element
- assign a value that describes how it should appear
For example, if we want all our H1 elements to be blue, we would use the following CSS rule:
h1 {color: #0000ff;}
The selector, in this case, is H1.
{color: #0000ff;}
is a declaration block. A declaration block starts with a left curly brace and ends with a right curly brace. It contains one (in this example) or more declarations, each separated by a semicolon.
color: #0000ff;
is a declaration, which consists of a property (in this case, `color`) and a value (in this case, `#0000ff`) which is applied to that property.
A declaration block can contain more than a single declaration. For example, we can make all H1 elements both blue and italicized with this CSS rule:
h1 {
    color: #0000ff;
    font-style: italic;
}
Each declaration is separated from the rest by a semicolon. Technically, the last declaration in a series or a single declaration doesn’t need a semicolon afterward, but it’s good practice to include it. (If you add another declaration, you won’t need to remember to add the semicolon later.)
You can also include multiple selectors in a declaration, by separating them with commas. For example, this CSS rule will change all headings to blue and italic:
h1,
h2,
h3,
h4,
h5,
h6 {
    color: #0000ff;
    font-style: italic;
}
You could place all the selectors on a single line, but it’s a best practice to keep each one on its own line.
Stylesheets
A stylesheet is a collection of rules that describe the appearance of an HTML document. There are three ways to attach a stylesheet.
External Stylesheets
An external stylesheet is a separate text document with an extension of `.css` You link to it using the HTML `<link>` element in the document’s `<head>`:
<head>
<link rel="stylesheet" type="text/css" src="style.css">
</head>
The “type” attribute defines the language used in the stylesheet. It is required in HTML4 and X/HTML, but is optional in HTML5, which defaults to “text/css”.
The primary advantage of using an external stylesheet is that all your styles can be contained in a single stylesheet to which all your web pages link. This makes it easy to unify the appearance of your web site, because changing a single CSS rule affects the entire site.
What you name your stylesheet is entirely up to you, but it helps to choose something that makes sense. You’ll commonly see `style.css` and `styles.css` on the web; you’ll also see stylesheets names for the location where they’re applied, such as `screen.css`, `print.css`, or `mobile.css`.
Internal Stylesheets
There are times when you need to define styles for a single page on your website, such as for a contact form. Adding those styles to an external stylesheet doesn’t make sense because you are adding styles to a global item when they are used only on a single page.
In such a case, an internal stylesheet makes sense. Use the HTML `<style>` element in the `<head>` of an HTML document to contain style rules unique to that page:
<head>
<style>
    h1 {
        color: #0000ff;
        text-style: italic;
    }
</style>
</head>
Again, the “type” attribute is optional in HTML5 and required in HTML4 and X/HTML.
Inline Stylesheets
HTML body elements (that is, those elements that aren’t located in the `<head>` element) also have a style attribute that can contain a list of CSS declarations (separated by semicolons) that style that instance, and only that instance, of that element. For example,
<h1 style="color: #0000ff; text-style: italic;">
    This is a blue italic heading.
</h1>
will make that particular level-one heading both blue and italic, but all other `<h1>` elements will be unaffected by this rule.
This may seem to be a handy way to style HTML elements and thus is very tempting to use endlessly. I recommend that you avoid this practice at all costs, primarily because it mixes content and presentation—which is one of the reasons CSS was developed in the first place. There are better ways to style a single element (which I’ll discuss later), but this can still be useful when experimenting, or when using a CMS where you don’t have immediate access to the `<head>` element.
CSS Comments
Comments in CSS begin with `/*` and end with `*/`. Anything between them will be ignored.
CSS comments can exist on a line by themselves, can span several lines, or can occur anywhere within a line. This makes them very useful for documenting your stylesheet and for troubleshooting.
The following are all valid examples of comments:
/* The following makes H1 elements blue and italic: */
h1 {
    color: #0000ff;
    font-style: italic;
}
h1 {
    color: #0000ff; /* blue */
    font-style: italic; /* italic */
}
/* Comment out this entire rule to troubleshoot:
h1 {
    color: #0000ff;
    font-style: italic;
}
*/
Stylesheet Structure
Unlike HTML, there is no inherent structure to a CSS document. It is customary to use comments to document your code, as well as to group related selectors in a meaningful way.
There is no best way to organize your stylesheet—how you do so is entirely up to you and the needs of your site. There are poor ways to organize a stylesheet, the most notable of which is not to organize it at all. A good way to learn how to (or how not to) organize a stylesheet is to see how others do it by using your browser’s “View Source” function to view the stylesheets of other websites. Such an exercise can be highly enlightening.
As you gain experience with CSS, you will probably organize your stylesheet according to how CSS rules cascade. This is a complicated process, and so will be the subject of another tutorial, although I’ll give a brief overview of it later.
Class and ID
Sometimes you want to style all instances of an HTML element the same way. For example, you may want to style all your paragraphs so that they are a dark grey, rather than black. In that case, you could use this CSS:
p {
    color: #222222;
}
However there may be times when you want to style only some instances of an HTML element. In that case, we can define a CSS class with the definitions we want, and then apply that class to an HTML element in our document.
For example, we may want to style an entire paragraph with red text, perhaps as a warning. We can accomplish that with this CSS:
.warning {
    color: #ff0000;
}
And in our HTML document we would use:
<p class="warning">
This paragraph provides a warning and so appears in red text.
</p>
The `.warning` class we defined above will work with any HTML element that has a `color` property. So all of the following items will appear in red:
<p class="warning">This is a warning paragraph.</p>
<h3 class="warning">Danger, Will Robinson!</h3>
<li class="warning">The one item in this list you don't want to ignore.</li>
If necessary, we can also define class that only affect particular HTML elements:
p.warning {
    color: #ff0000;
}
li.warning {
    font-weight: bold;
}
In our HTML document, this element
<p class="warning">Danger! Achtung, Baby!</p>
will appear in red, and this element
<li class="warning">Don't forget this important step!</li>
will appear in its default color but with bold text.
A CSS ID works similarly to a CSS class, with two main exceptions:
- The name is preceded by a hash mark (#) instead of a period (.).
- A CSS ID can only be applied to a single instance of a single element on an HTML page.
The latter property is especially important, because it allows you to uniquely target a specific element on a page with CSS, HTML (when you create internal links on a page, for instance), and especially with JavaScript. (In HTML5, id replaces name which is deprecated everywhere except in forms.)
You can apply multiple class selectors to an HTML element. For example, suppose you want some of your paragraphs to be blue, some to be indented from the left, and some to be both blue and indented. We don’t need three separate classes for this, only two:
.emphasis {
    color: #0000ff;
}

.indent {
    padding-left: 20px;
}
And in our HTML:
<p class="emphasis">This paragraph is blue.</p>

<p class="indent">This paragraph is indented 20 pixels from the left margin.</p>

<p class="emphasis indent">This paragraph is both blue and indented 20 pixels from the left margin.</p>
Combining Selectors
It is possible to combine selectors in a stylesheet to target only specific areas in the document or that match a particular markup pattern. (We’ve already seen a bit of this with `p.emphasis` and `li.emphasis`.)
For example, if you have `<div id=”nav”>` in your HTML document that you are using for your navigation menu (which is an unordered list), you can target that unordered list with this CSS:
#nav ul {
   style elements;
}
and you can target the list items themselves with:
#nav ul li {
    style elements;
}
This is one of the most powerful features of CSS, as it allows you to target large groups of very specific elements. (It’s easy to overdo it, as well. If you find that you are writing long chains of selectors, you may want to rethink how you are writing your CSS or how you are structuring your HTML.)
Cascading
Now that you have a general idea of how CSS rules work, it’s time to look at the cascading part of CSS. Because certain properties (such as `color`) can be defined more than once, we need to have a method for determining which declaration will ultimately be applied. CSS uses three criteria to determine this: weight, specificity, and order of appearance.
Weight
Most people don’t realize that all browsers have a built-in stylesheet that dictates how HTML documents should appear if no other stylesheets are applied. This stylesheet is responsible for making sure that the `<h1>` element is the largest of all headings (and that `<h6>` is the smallest), as well as setting margins, padding, fonts, etc. This built-in stylesheet is why a bare-bones HTML document appears different in different browsers.
This built-in stylesheet is called the user-agent stylesheet and if no other style rules are present, its rules will be used. Of all stylesheets, it has the least amount of weight.
After the user-agent stylesheet, there is the user stylesheet which is created when you set font colors and sizes in your browser preferences:
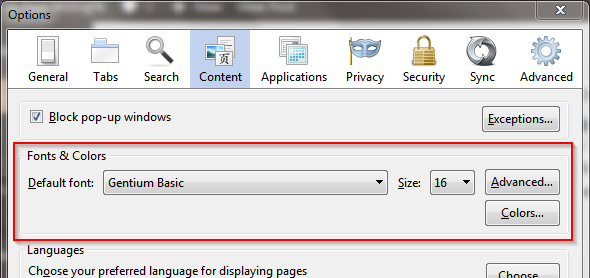
For example, most browsers use a serif font by default (as set by their user-agent stylesheet). You can override that to a sans-serif font (or even a different serif font, as I have done above) in your preferences, which alters your user style sheet. At this point, all websites you visit will be displayed in your font of choice, unless the website designer overrides it. (Which is one reason web designers should avoid using user style sheets.) The user stylesheet is heavier than the user-agent stylesheet.
Finally, there is the author stylesheet which the creator of a website creates, and which we have been discussing. These are the heaviest of the three stylesheets, and its declarations are the ones that will be applied if they conflict with either of the first two.
Specificity
The specificity of a declaration refers to how precisely the selector for that declaration is defined. For example, this CSS rule:
p {
    color: #222222;
}
refers to any paragraph element, anywhere in the HTML document. However, this CSS rule:
footer p {
    color: #999999;
}
only targets those paragraphs that appear within a `<footer>` element. It is more specific than the first. So within the `<footer>` element, all paragraph elements will have color `#999999` (a medium grey) instead of `#222222` (a dark grey) because the second rule, which is more specific, takes precedence over the first rule, which is less specific.
In actual practice, specificity is quite complicated because there are a large number of ways to combine selectors, all of which are beyond the scope of this brief introduction, but which I will discuss in a future tutorial.
Order of Appearance
If both weight and specificity are equal, then the order in which a declaration appears determines which is applied. In this case it’s best to be last, because the declaration that appears last is the one that gets applied.
As a simple example, if you see this CSS:
p {color: blue;}
p {color: red;}
all paragraphs in that document will appear red, rather than blue, simply because the declaration which makes them red appears after the declaration that makes them blue.
It is rare to have the same rule in a single stylesheet, so order of appearance usually becomes important when multiple external stylesheets are used.
Summary
This is meant to be a basic introduction to CSS. We haven’t covered units (pixels vs. ems vs. percent, etc.), specific properties, or inheritance, and while we’ve touched on cascading, it is more complicated than the very brief snapshot we have here. There is a lot I’ve left out, but if there is interest, I will add more detailed tutorials in the future.
https://techblog.kjodle.net/2015/02/23/css-a-very-basic-introduction/
